HOW TO: Configure Modern Authentication (OAUTH)
Last modified:
Configuring Modern Authentication (OAuth) with a Secret:
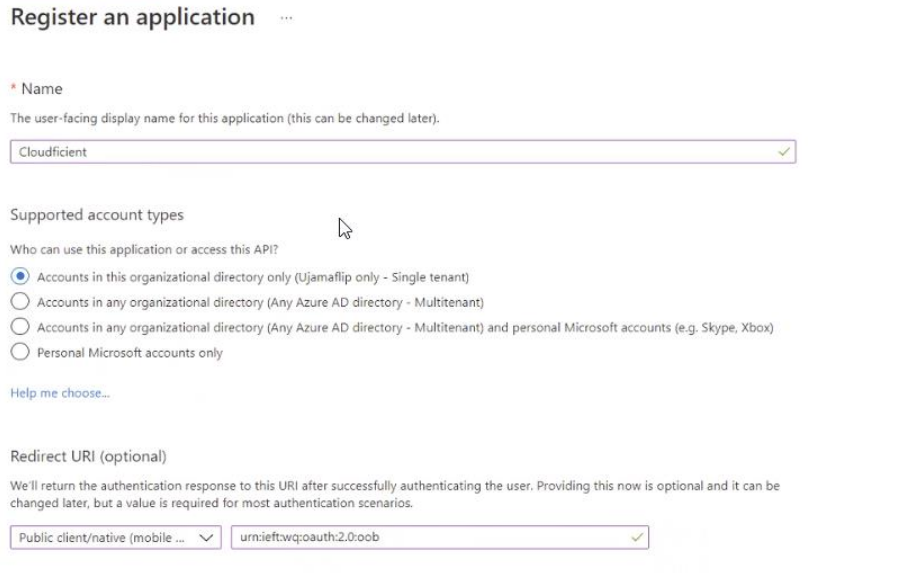
Step 1: Create a new Registered Application in Azure
1.Go to https://portal.azure.com and log in to your Office 365 tenant with an administrator account.
2.From the left menu, select Azure Active Directory > App registrations.
3.Click New registration.
4.Enter a name "Cloudficient" or use your standard naming convention
5.From the Supported account types, select one for "Single tenant" as show on picture below.
6.For Redirect URI (optional) add the following:
- Public client/native
- urn:ieft:wq:oauth:2.0:oob
7.Click Register.
8.Copy the Application (client) ID, Object ID, Directory (Tenant) ID and save it somewhere secure that you will remember. You will need it later.'
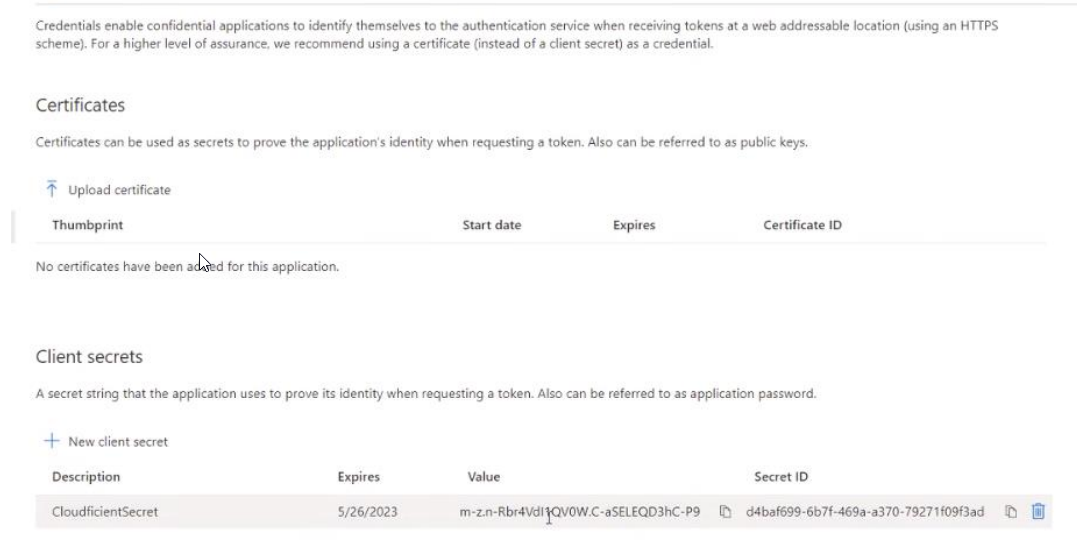
Step 2: Configure Application Secret
1. Under registered app on the left side panel go to Certificates and Secrets
2. Select New Client Certificate
3. Enter description CloudficientSecret (or use your standard naming convention)
4. Choose Expiry duration and click Add.
5. Copy the Secret Value right after creation and save it somewhere secure. We will need it later.
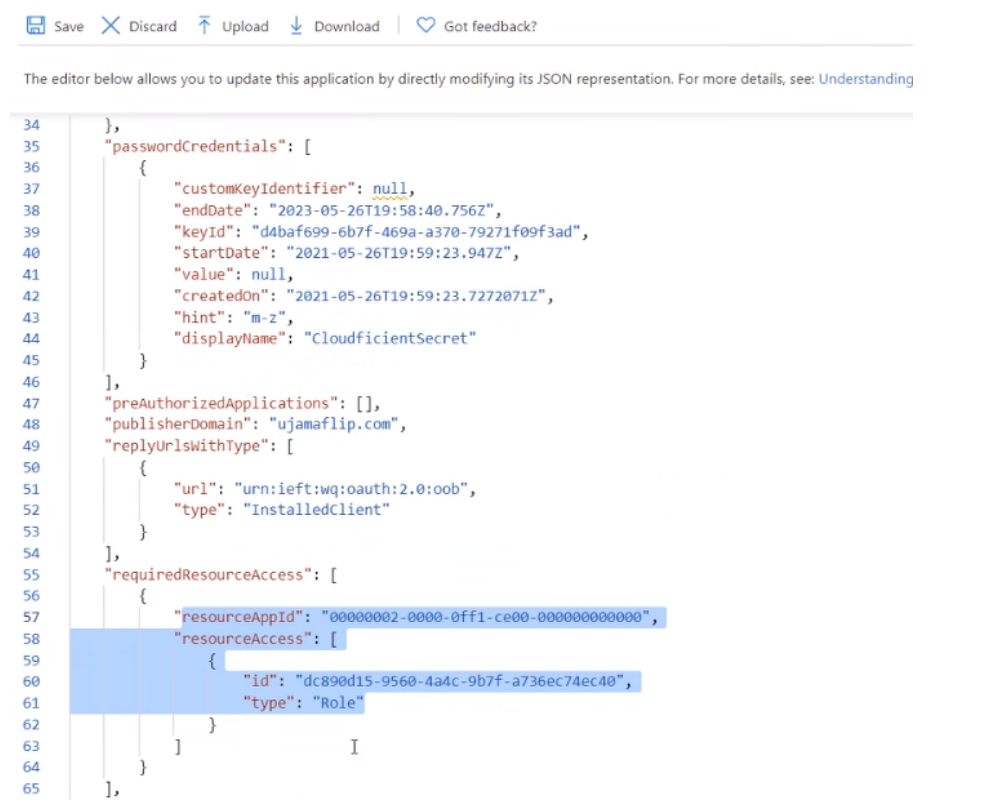
Step 3: Manifest
1. On the left side panel select Manifest
2. In the manifest locate the requiredResourceAccess property
3. Change following properties with the values below:
• Change ResourceAppID: 00000002-0000-0ff1-ce00-000000000000
• Change the ID: dc890d15-9560-4a4c-9b7f-a736ec74ec40
• Change Type: Role
4. Click Save
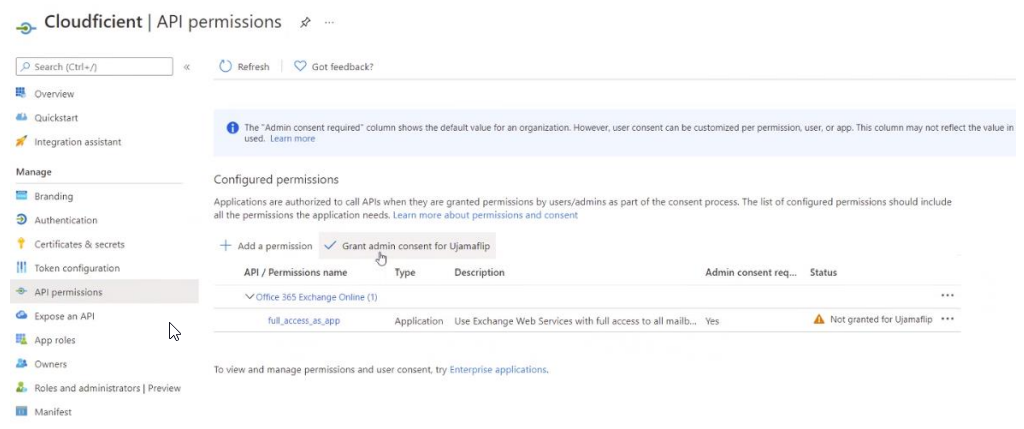
Step 4: API Permissions
1. Select your application, and then select API Permissions.
2. Click Add a Permission.
3. In the Request API permissions section > Select APIs my organization uses, search for Office 365 Exchange Online and select this API.
4. Click Application Permissions.
5. In the Permissions list section, select the full_access_as_app.
6. Click Add permissions.
7. Click Grant Admin consent for the newly added permission